I’ve spent a few years now looking for a higher-performing network-wide Proxy or VPN service. I’ve modified some frameworks, like nginx and openvpn, and I’ve created my own versions of those frameworks as well. After modifying OpenVPN, I decided to implement my own version of that modified functionality in roughly 1000 lines of C from 0. I spent some time recently fixing it up and tuning it up and I just wanted to summarize and write about it again. I’ve observed that there are 2 kinds of VPNs with 2 highly different use cases and design differences required. For example:
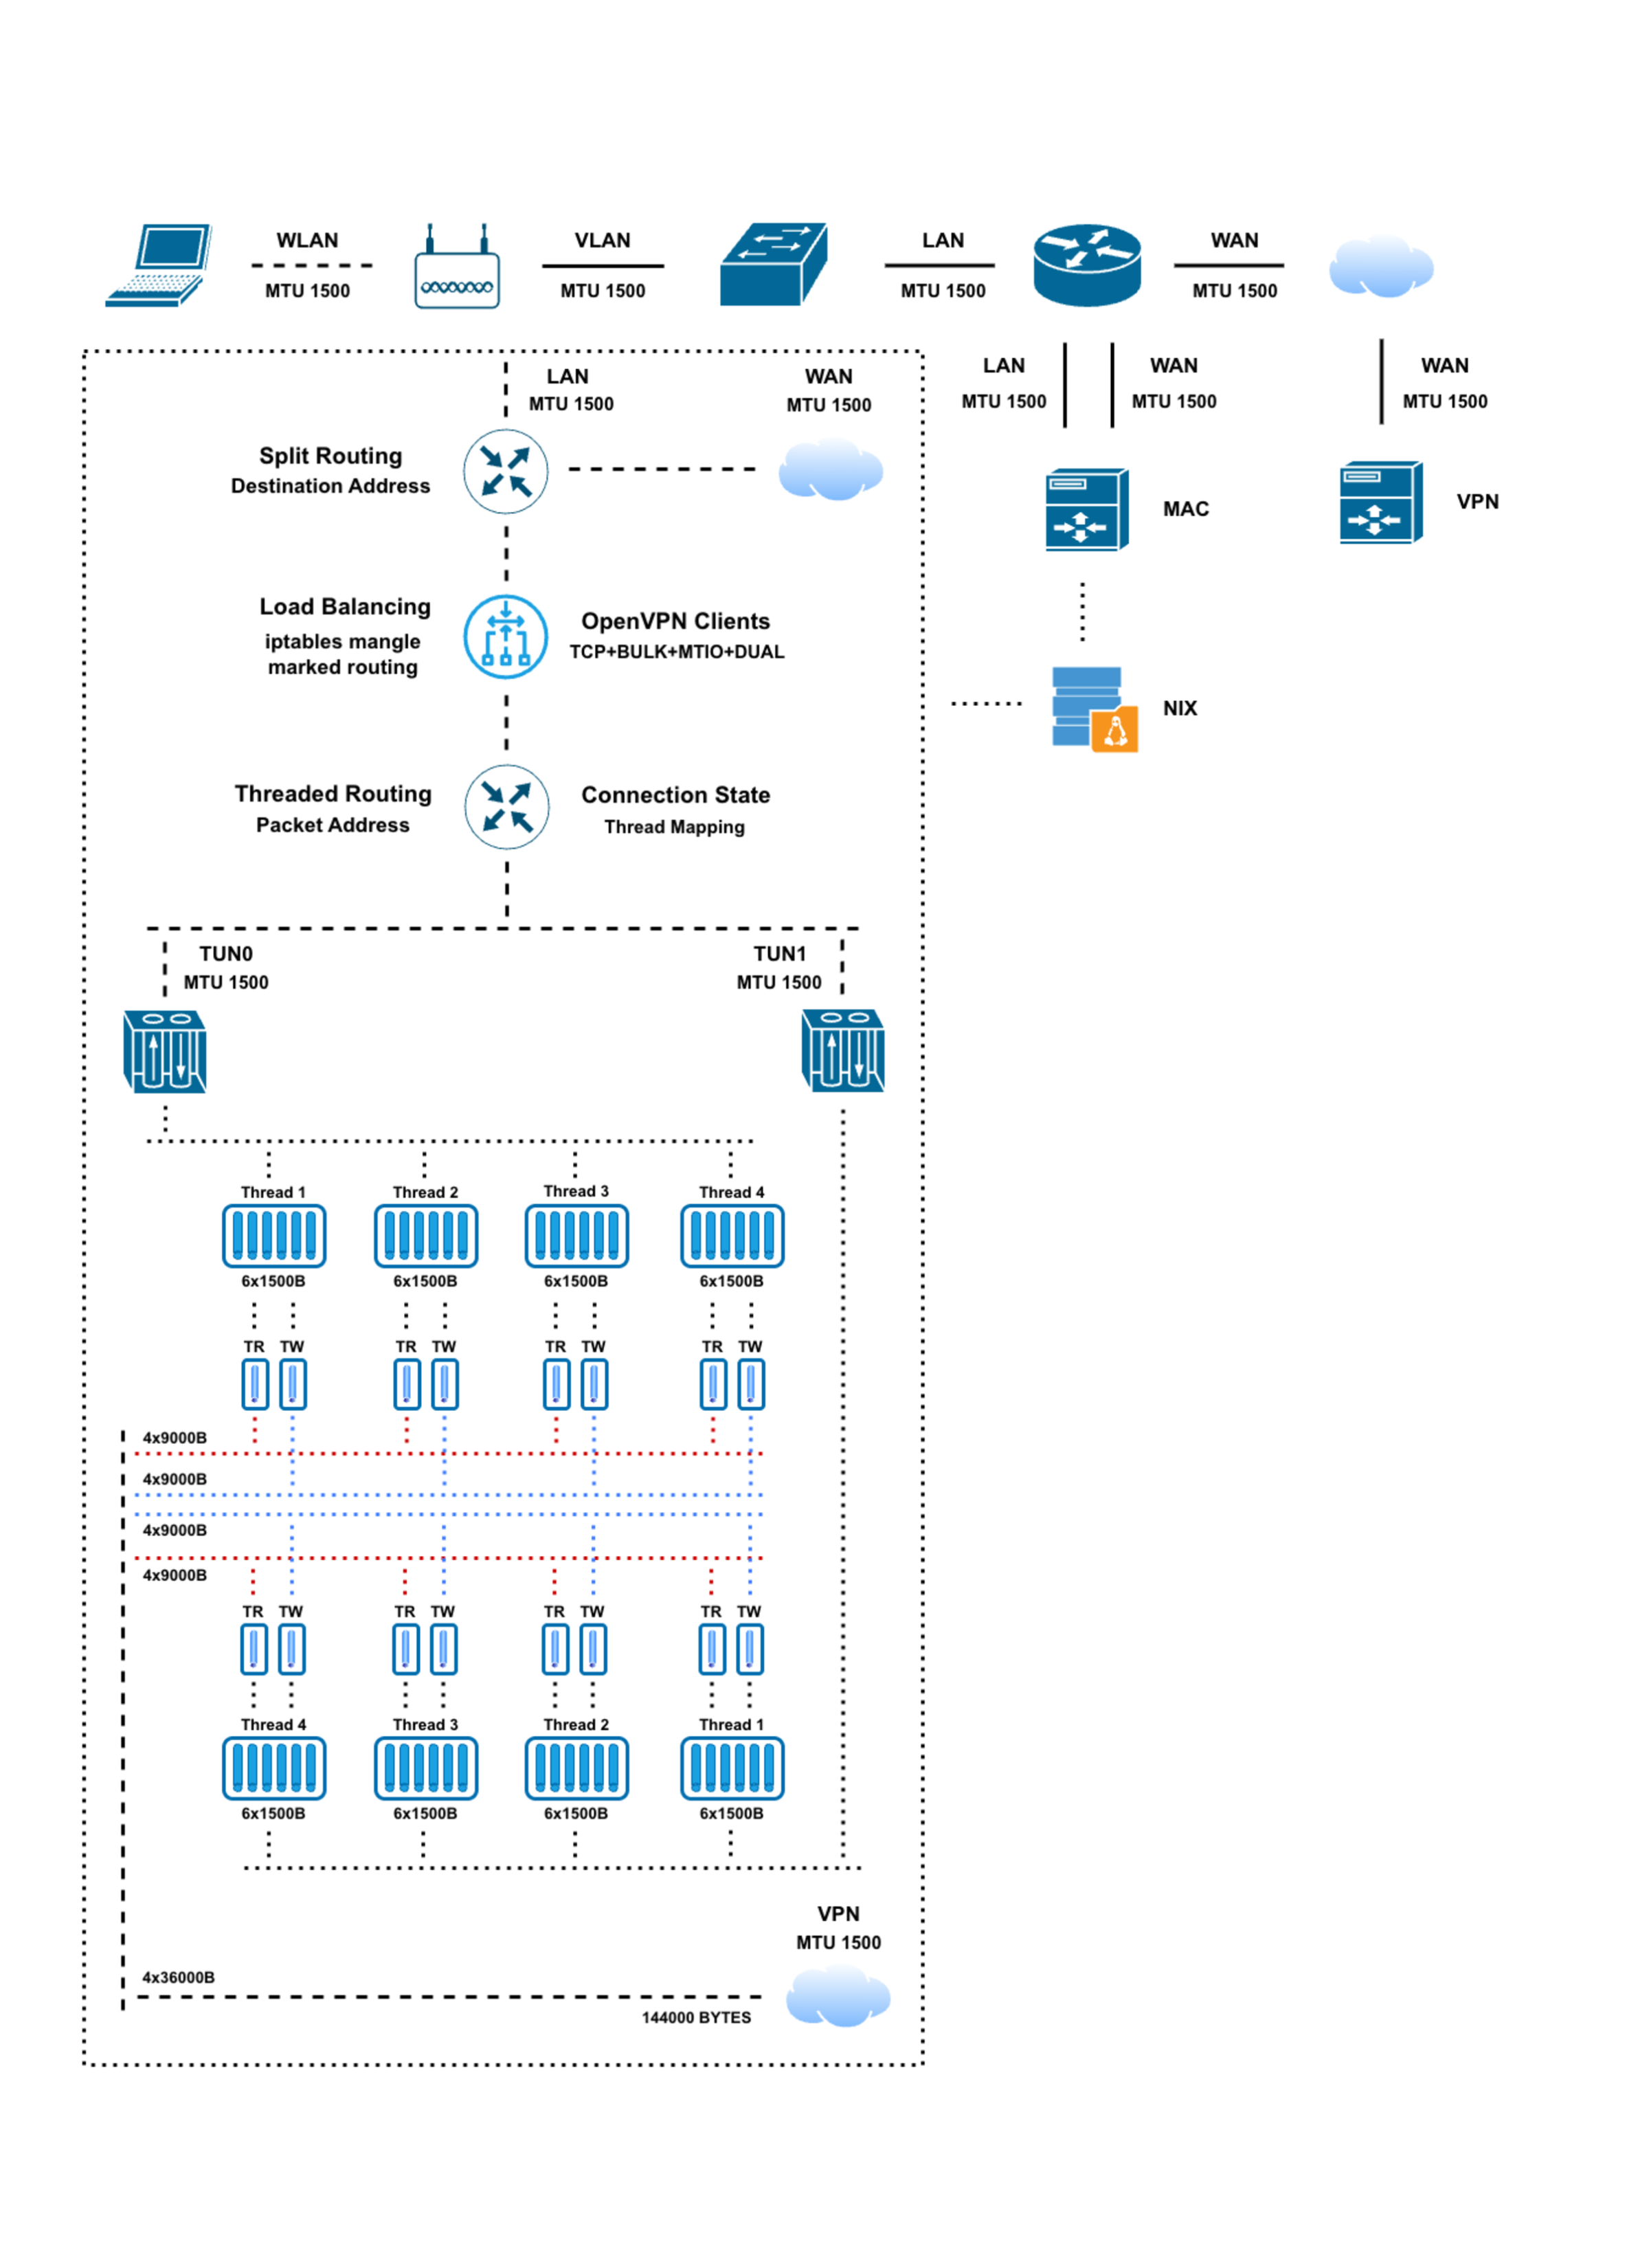
Client (WiFi) -> VPN -> Server (Wire) [service] - This can be UDP based as the client is directly setting the lower sized MTU tunnel interface on it's operating system so that it can properly size the outgoing packets before they are sent out from the machine so they won't be fragmented or dropped during the routing through the network as well as the underlying connection can also be too flakey for other protocols.
Router (Wire) -> VPN -> Server (Wire) [infrastructure] - This should be TCP based which can handle a full sized MTU tunnel interface as the data is sent out in a synchronous stream rather than individual packets and the clients are not aware of any smaller sized MTUs in the middle of the network routing path as they assume a standardized 1500 byte MTU size by default and in addition there is less risk of communication interruption for a wired connection.
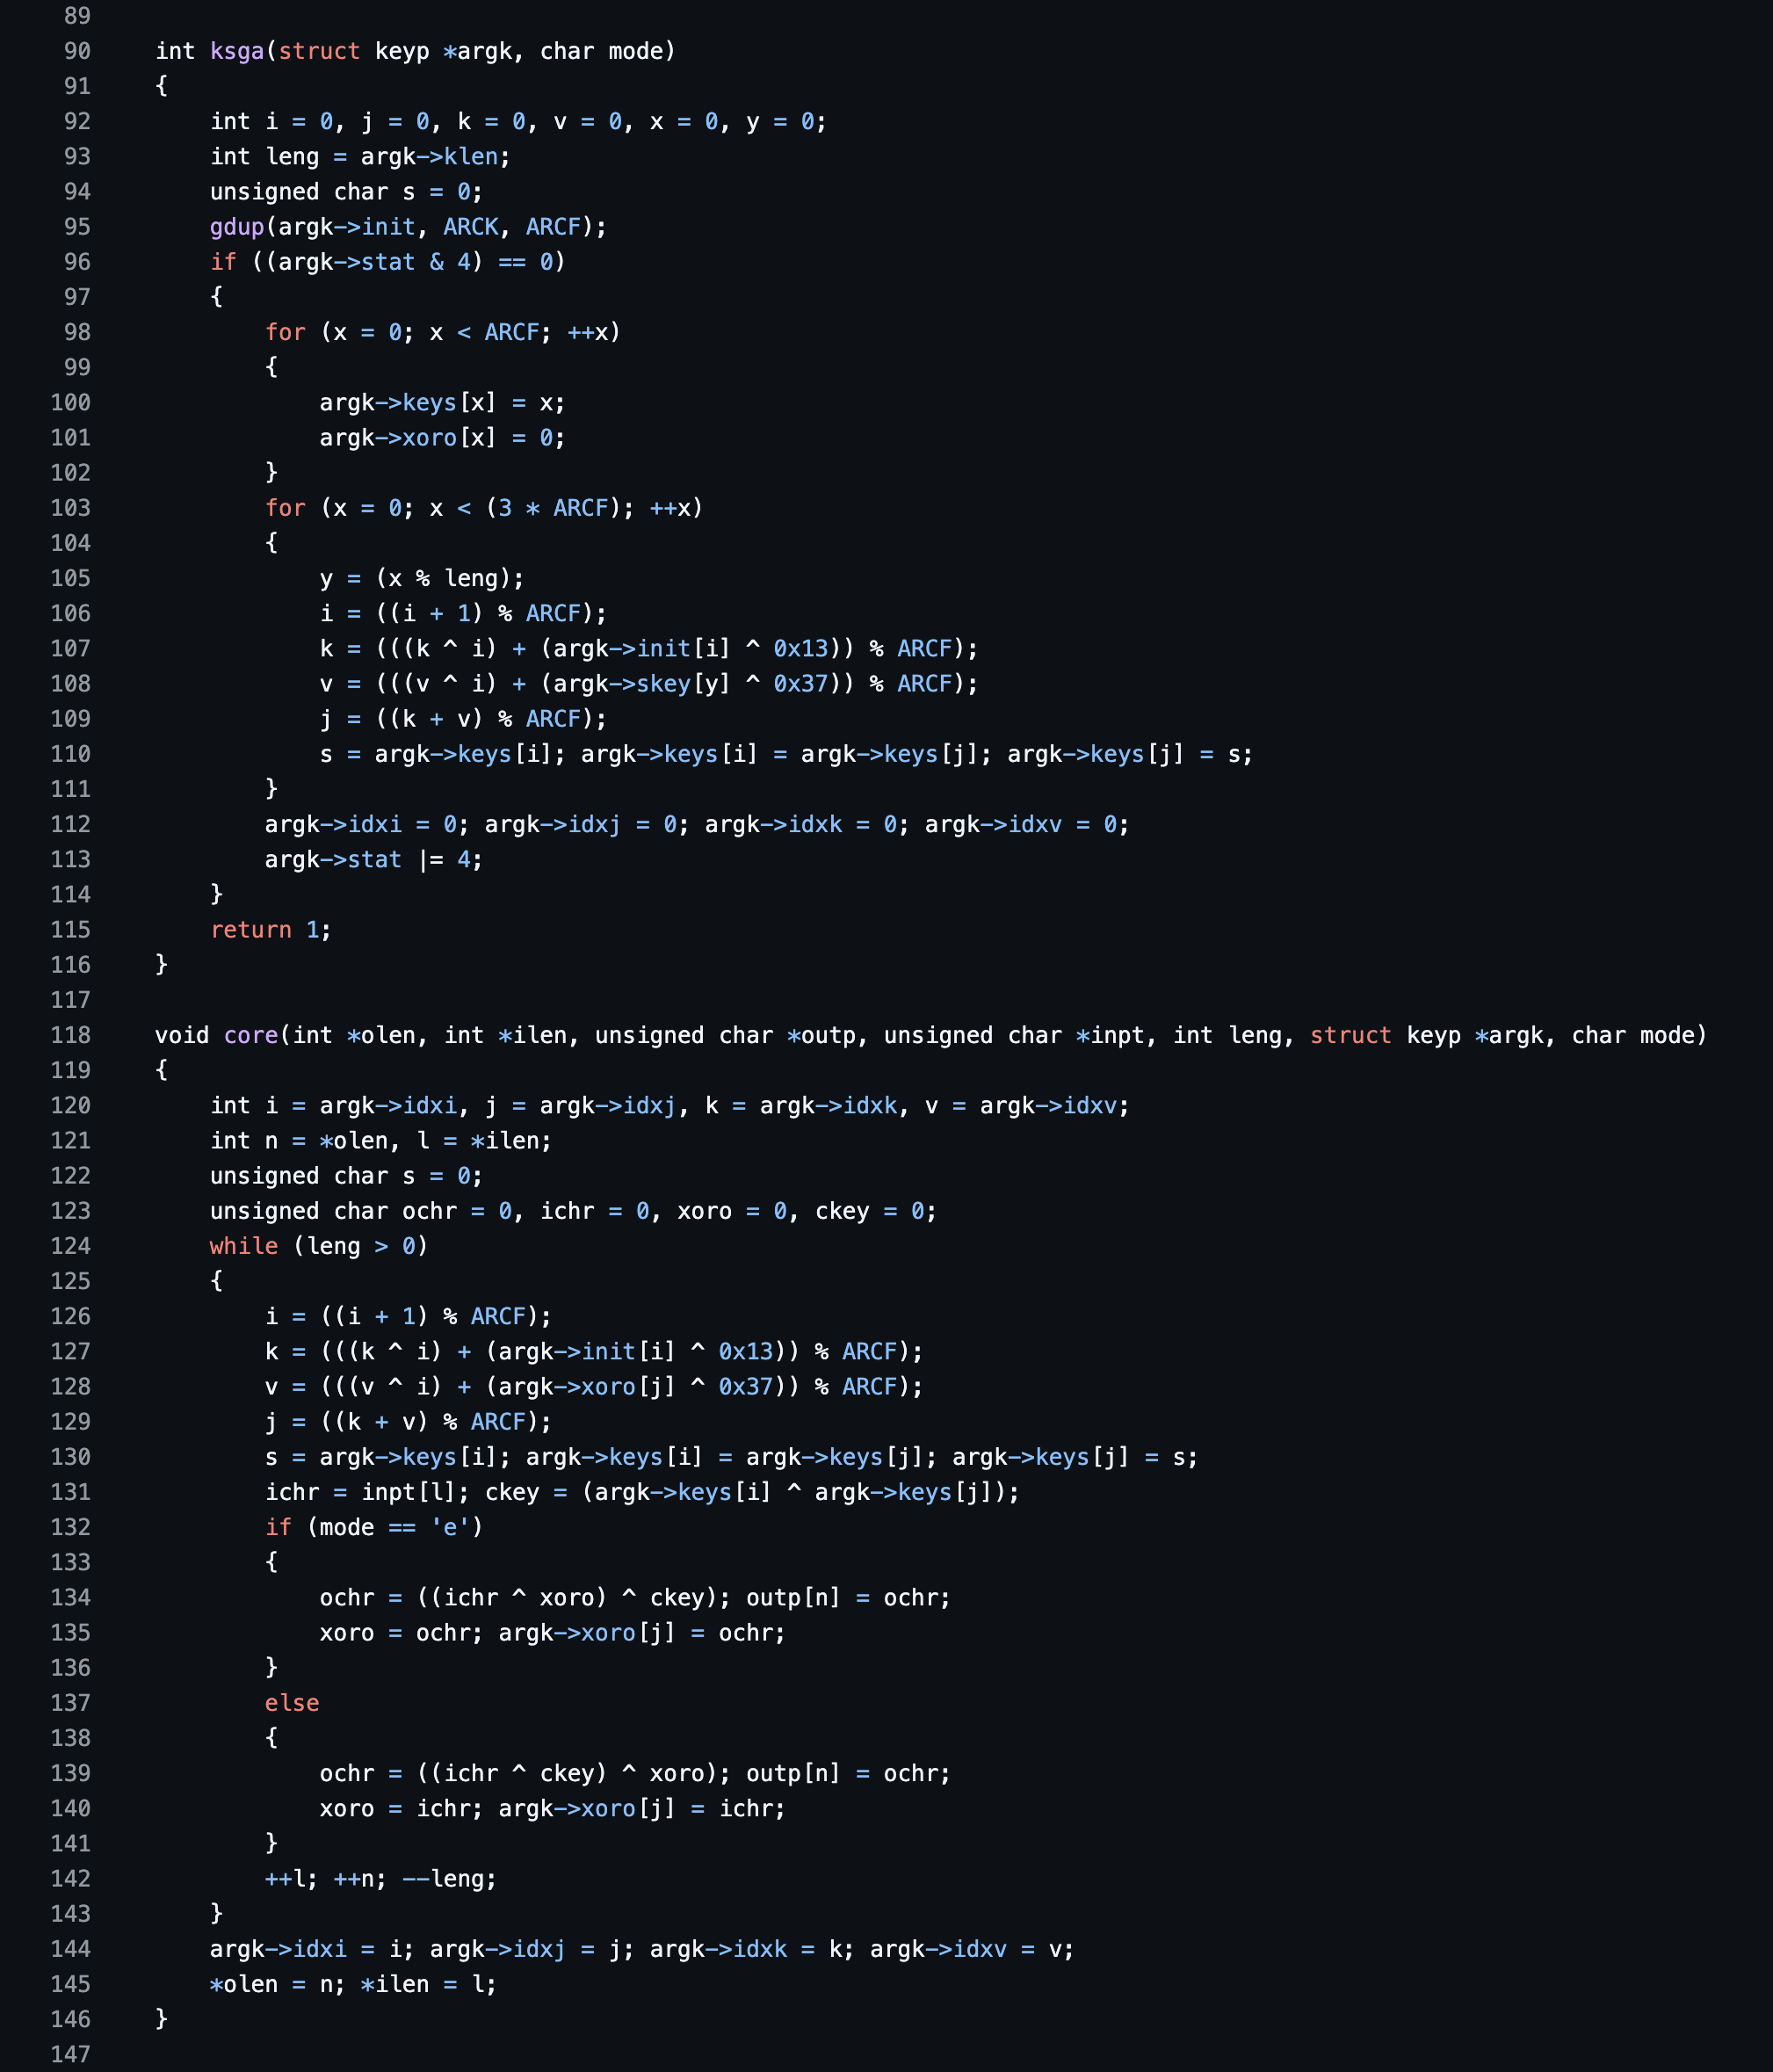
The code is written in C and can be ran with multiple processes at the same time and each process will launch multiple threads which will all operate on a TUN interface created by that process so that the traffic can be load balanced across interfaces as well. The threads will read multiple packets in bulk and transfer them all over TCP in a single large size write/read socket call. It is fairly efficient and performative in my testing so far! No Bloat!!
Picture Post: fossjon.com/2026/01/04/going-back-to-re-…
🙂
Source Code: github.com/stoops/vpn/blob/main/tun.c
~